Installation and your account
After your purchase, you’ll receive a license key, and access to your account.
In your account you can download the plugin and all add-ons, manage your license key(s), whitelist sites for your license, manage your subscription(s), and customize and download invoices.
Download and install the plugin and add-ons
To install FacetWP and its add-ons, log in to your account and download the desired plugins.
Upload the ZIP file(s) into Plugins > Add Plugin > Upload Plugin, or manually extract the plugin folder(s) into /wp-content/plugins/ and upload. Then activate the plugin(s).
Next, whitelist your license key for your site(s) and activate it:
Manage your license key(s)
Whitelist your site(s) and activate your license key
To activate your license for your site(s), follow these steps:
-
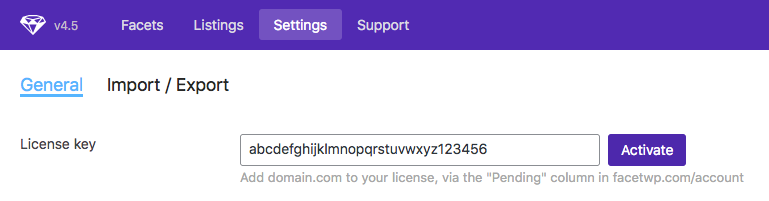
Browse to Settings > FacetWP > Settings > General, paste the license key into the “License key” field, then click the “Activate” button.
You’ll see the message: “Add [domain.com] to your license, via the “Pending” column in facetwp.com/account”:
Paste the license key and click “Activate”. If the system detects that the site is a staging/development site, you’ll see an “All done, thanks for activating!” message instead, the license will be activated immediately, and you’re done at this point.
- To add your site to your license, log in to your account.
-
Scroll down to the “Licenses” heading, where you’ll see your active (and expired) license(s). In the “Allowed” column, you’ll see the maximum number of allowed sites for your license plan, and how many sites are currently whitelisted:
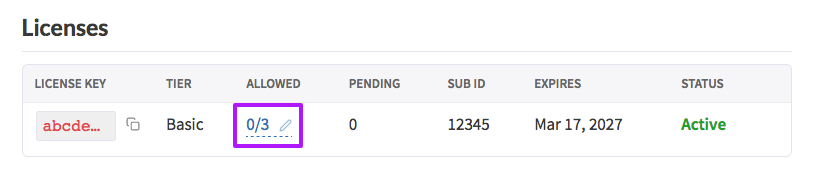
The number of allowed sites for your license plan. Note that so-called “grandfathered” licenses will show
999allowed sites, because these were sold at a time when the number of sites was unlimited. -
Click on the pencil icon in the “Pending” column. This will show a list of sites that tried to activate the license key (for which the “Activate” button in the site’s FacetWP settings was clicked).
If you see no pending site, add your key to your site and click “Activate”, as described in step 1, and refresh the account page.
Click the “Add” button for the pending site(s) you want to add to this license:

Whitelist a site by clicking the pencil icon in the “Pending” column, and clicking the “Add” button for the site. - Refresh the page, and click the pencil icon in the “Allowed” column to see your whitelisted site(s). The first number in the “Allowed” column should reflect the number of whitelisted sites.
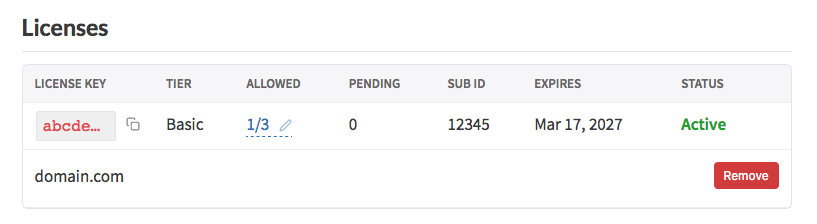
Click the pencil icon in the “Allowed” column to see all whitelisted sites. To remove a site from the license again, just click the red “Remove” button. Note that to stop a site from using the license, this is not enough. See the explanation below.
- In the site, browse to Settings > FacetWP > Settings > General, and click the “Activate” button again. You should now see “All done, thanks for activating!”. After refreshing the page, the message will show: “Valid until [date]”.
Activate your license key in wp-config.php or functions.php
If you prefer to keep your license key in code, you can add it to wp-config.php:
How to use custom PHP code?
PHP code can be added to your (child) theme's functions.php file. Alternatively, you can use the Custom Hooks add-on, or a code snippets plugin. More info
define( 'FACETWP_LICENSE_KEY', 'xxxxxxxxxxxxxxxx' );
If you add the key in wp-config.php like this, the license key field in Settings > FacetWP > Settings > General will be disabled and grayed out. This may be useful if you want to prevent users from changing or deleting the key manually. Note that you could also entirely hide the license key setting in this case.
Alternatively, you can add your key with the facetwp_license_key hook in your (child) theme’s functions.php:
How to use custom PHP code?
PHP code can be added to your (child) theme's functions.php file. Alternatively, you can use the Custom Hooks add-on, or a code snippets plugin. More info
add_filter( 'facetwp_license_key', function( $license_key ) { return 'xxxxxxxxxxxxxxxx'; });
If you previously activated your license key manually, follow these steps to switch:
Switch the license key activation method
To switch from using a manually entered license key to a license key set in wp-config.php or functions.php, follow these steps:
- Go to Settings > FacetWP > Settings > General.
- Remove the key from the license key field, then click the “Activate” button.
- Below the field will be the message “The license does not exist”, and the Support tab (after a page reload) will display “Active License Required”.
- Add your key to your
wp-config.phporfunctions.php, as explained above. - Reload the FacetWP Settings page. Now you’ll see the key in the License key field. If you added it in
wp-config.php, it will be grayed out. - Click the “Activate” button.
In a WordPress multi-site setup, this procedure is the same, except you’ll have to do this for each sub-site, also if you use Network Activation.
License keys and multi-site
If you are using FacetWP in a WordPress multi-site setup, be aware that you have to activate your license key for each sub-site individually, also if FacetWP is Network Activated.
Also note that each sub-site counts against your license plan’s site limit.
License key restrictions
Depending on your license plan, you can use your license key on up to 3, 20, 100, or 500 live sites.
The allowed number for your license is shown in your account. Under the “Licenses” heading, you’ll see your active license(s). In the “Allowed” column, you’ll see the maximum number of allowed sites for your license plan, and how many sites are currently whitelisted:
Note that so-called “grandfathered” licenses will show 999 allowed sites, because these were sold at a time when the number of sites was unlimited.
You are allowed to activate your license on as many local, development or staging sites as needed. These kinds of sites do not count against the allowed limit of your license plan.
Note that if you are using FacetWP in a WordPress multi-site setup, each sub-site counts against your license’s site limit.
Free use on local, staging- and development sites
You are allowed to activate your license on as many local, development or staging sites as needed. These kinds of sites do not count against your the allowed limit of your license plan.
To activate a license on such a site, browse to Settings > FacetWP > Settings > General, add your key to the “License key” field, and click the “Activate” button. These sites will not show up in your account and do not have to be whitelisted manually, like normal/live sites.
To determine if a site is a local/staging/development site, our account system compares the URL to the following URL patterns:
How to use custom PHP code?
PHP code can be added to your (child) theme's functions.php file. Alternatively, you can use the Custom Hooks add-on, or a code snippets plugin. More info
[ '.wpengine.com', '.wpenginepowered.com', '.pantheonsite.io', '.flywheelsites.com', '.cloudwaysapps.com', '.myftpupload.com', '.kinsta.cloud', '.kinsta.com', '.ngrok.io', 'demo.', 'dev.', 'dev-', 'test-', 'local.', 'develop.', 'stage.', 'staging', 'stg.', 'stg-', 'sandbox.', 'alpha.', 'beta.', 'test.', '.dev', '.test', '.local', '.stage', '.vanwp.ca', '.sg-host.com', '.tempurl.host', '.mystagingwebsite.com', '.tinydevbox.org', '.lndo.site', '.vtx' ];
If your local/staging/development site’s URL pattern is not in this list, contact us in support, and we’ll consider adding it.
Remove a site from a license
If you want to remove a site from your license key, follow these steps:
- Log in to your account.
- Under the “Licenses” heading, you’ll see your active license(s). Click on the pencil icon in the “Allowed” column. This will show all whitelisted sites that are using the license.
- Click the red “Remove” button to remove a site from your license:
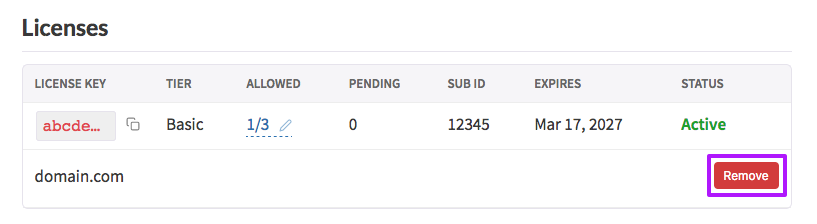
Click the red “Remove” button to remove a site from your license. - In the site, browse to Settings > FacetWP > Settings > General, then clear the “License key” field and click the “Activate” button. There will be a “The license does not exist” message. The site is now removed from the license.
Hide the license key setting
If you want to hide the license key setting, for example, to prevent other admin users from copying or re-using it, you can add the following to your (child) theme’s functions.php:
How to use custom PHP code?
PHP code can be added to your (child) theme's functions.php file. Alternatively, you can use the Custom Hooks add-on, or a code snippets plugin. More info
add_filter( 'facetwp_settings_admin', function( $settings ) { unset( $settings['general']['fields']['license_key'] ); return $settings; });
Using your account
After your purchase, you get access to your account, where you can view your license details and purchase history, and where you can generate, download and customize invoices for every purchase you made.
You can also download the latest plugin version and all add-ons.
The account page also shows an overview of all live sites that are using your license key(s), and you can whitelist sites, and remove sites from a license key.
Log in to your account
You can log into your account with the email address that you used when buying your license. After clicking the button, the system will send you an access link that is valid for 8 hours.
If you are not receiving the email with the access link, check your spam filter. Make sure the address hello@facetwp.com is whitelisted.
If you’re still not receiving the link and you want us to email you an access link, or add another email address to your account (as “manager email”) to receive the login link, open a support ticket from within the plugin settings.
If you have added a manager email address that has trouble receiving the access link when trying to log in, you can create an access link for the manager email address with the “Copy access link” button next to the manager email address, and send it to them yourself. Note that access links remain valid for 8 hours only. And after using a newly created access link to log in, any previous access links will no longer work.
Retrieve a forgotten account email address
If you forgot which email address you used for your account, open a support ticket from within the plugin settings. We can see your account ID in the ticket and can retrieve your email address.
Regain account access if you lost access to the account email address
If you lost access to the account email address, for example because someone left your company, open a support ticket from within the plugin settings. We can send you an access link which can be used for 8 hours, to log in and change the main account email address.
Change your account name and email address
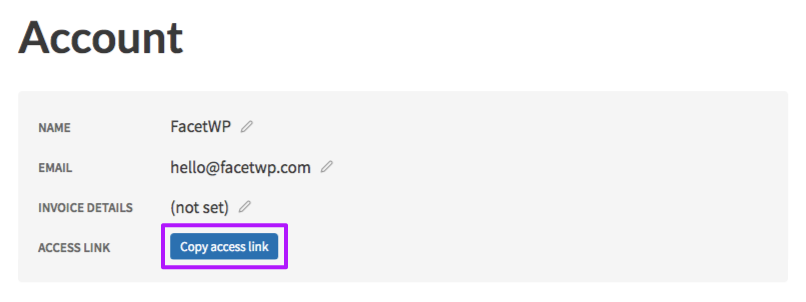
If you want to change your account name or email address, log in to your account. At the top of the page, click the pencil icon next to your name or email address to change it.
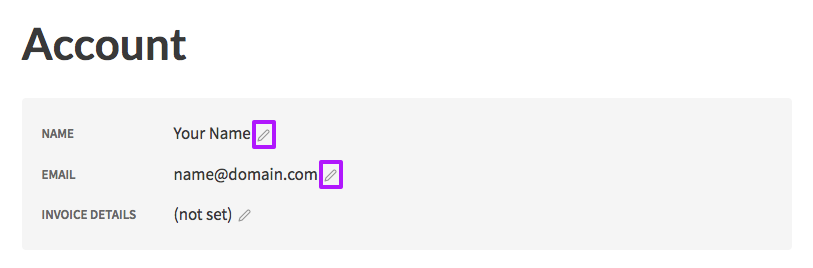
Note that the account name also appears on your invoice.
If you cannot access the current email address to receive the login link, please open a support ticket.
Generate, download, or customize your invoice
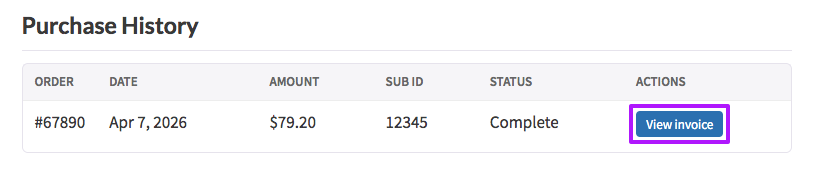
To view or download an invoice, log in to your account and scroll down to the “Purchase History” section. Click the “View Invoice” link on the right of the purchase you want to generate an invoice for. This will take you to the invoice, which you can print or download as a PDF with the button at the top.
If you want to customize the billing details on the invoice, for example, to add a company name, a billing address, or a tax/VAT number, go to the top of the account page, and click the pencil icon next to “Invoice details”:
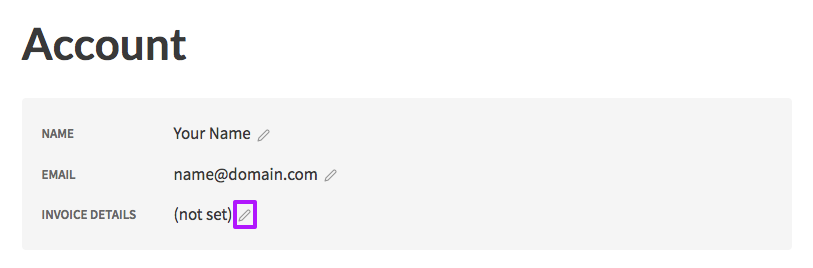
The saved content will show up in the PDF invoice under your name, under “Bill to”. The invoice name can be changed by clicking the pencil icon next to your name.
Add a manager email address

It is possible to add one or more account manager email addresses, so that multiple people can access the same account with their own email address.
To add manager email addresses, log into your account (as account owner, not as manager), scroll down to the “Manager Emails” section at the bottom, fill in the email address, and click the “Add Manager” button.
Each manager email address can be used to log into (or switch to) the account and has full access, except for the account name, email address, and invoice details at the top, which can only be changed if you are logged in as the account owner. Extra manager email addresses can also only be added or removed when logged in as the account owner.
Switch between accounts
If your account email address has access to multiple accounts (by being added as manager email to another account), you’ll see an account switcher to switch between all connected accounts, marked as “(yours)” for your own, or (“managed”) for managed accounts.
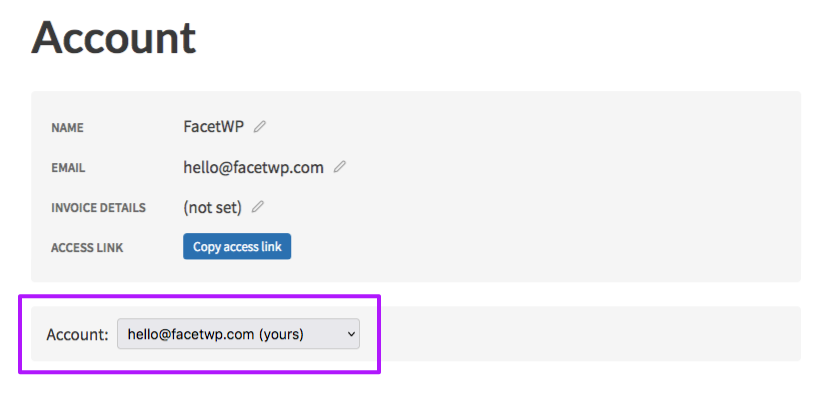
Note that if you switch to, or are logged in to a “managed” account, you cannot edit the account name, email address, and invoice details at the top, which can only be changed if you are logged in as the account owner. Extra manager email addresses can also only be added or removed when logged in as the account owner.
Create and send access links
If you want to send yourself or someone else an access link, log in to your account as the owner, and click the blue “Copy access link” button in the account info section. This button is only visible when logged in as the account owner, not as an account manager.
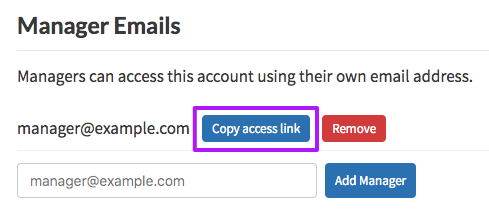
If you have added manager email addresses, you can also create access links for these email addresses. This can be useful if a manager is not receiving the access link via email when trying to log in, or if he/she does not have access to email at the moment.
Note that access links remain valid for 8 hours only. And after using a newly created access link to log in, any previous access links will no longer work.
Manage your subscription(s)
Renewals
Automatic renewals
By default, if you did not cancel it, your subscription will automatically renew after one year. A 20% discount on the normal price is automatically applied when your subscription is auto-renewed.
You can also manually renew an active subscription before the expiration date.
Some older, legacy accounts did not have auto-renewal and can expire. You’ll have to renew these licenses manually:
Renew an active or expired subscription
There are two ways to manually renew an active or expired subscription:
Renew by buying a new license with your license key as discount code
You can manually renew by buying a new subscription, and entering your existing license key (active or expired) into the “Discount Code” box during checkout. The account will then:
- Apply the 20% renewal discount;
- Add one extra year to the existing license’s expiration date. If the existing license hasn’t expired, it will add one year to the prior expiration date. If the existing license has expired, it will add one year from the date of purchase.
Note that you can only manually renew this way if the expiration date is less than 60 days away, or if the license has already expired. If the date of expiration is more than 60 days away, you’ll see the message “Renewal is not yet available for this license.”
Renew with the “Renew” button in your account
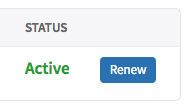
If your license has expired without having auto-renewed (which can happen for some legacy accounts), or if the expiration date is less than 60 days away, you’ll see a “Renew” button next to your license in your account. This button can also be used to manually renew your license. It will do the same as the renewal procedure described above.
Cancel your subscription
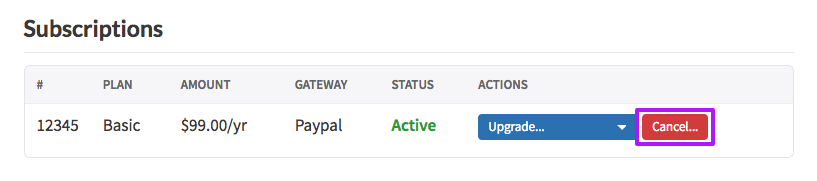
If you want to cancel your subscription, log into your account, scroll down to the Subscriptions section and click the red “Cancel …” button beside the active subscription:
Change your subscription payment
Change your Stripe payment gateway or credit card info
If you want to change or update your Stripe payment method/gateway or credit card info, log into your account, scroll down to the Subscriptions section, and click the blue “Update Card” button beside the active subscription:
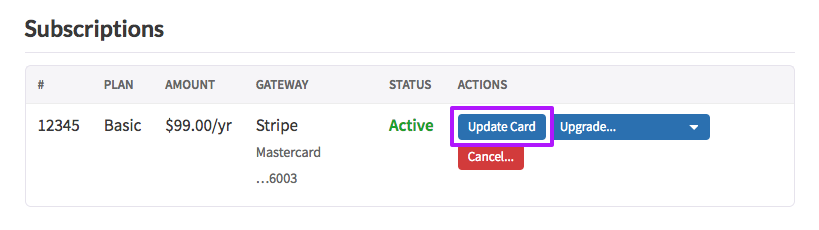
This will take you to a Stripe page, where you can view the subscription details, change payment methods, and update credit card details.
Change PayPal payments
If your subscription currently uses PayPal, any changes to your payment method need to be done directly in your account on paypal.com.
Switch between Stripe and PayPal
To switch your payment method from PayPal to Stripe or vice versa, you need to cancel the subscription before the renewal date. Then buy a new license, and make sure to enter your existing license key into the “Discount Code” box during checkout. This will apply the renewal discount and renew your existing (previously cancelled) license. If your license has a grandfathered price, the grandfathered renewal discount will be applied.
Upgrade to a higher license tier
We currently offer four license plans: Basic (3 sites), Professional (20 sites), Agency (100 sites), and Enterprise (500 sites).
You can upgrade your plan at any time, in your account. The system will automatically calculate the prorated upgrade cost for the remainder of the running subscription period. Note that we cannot process downgrades this way.
To upgrade your current license plan to a higher tier, log into your account, scroll down to the Subscriptions section, and click the blue “Upgrade…” button beside the active subscription:
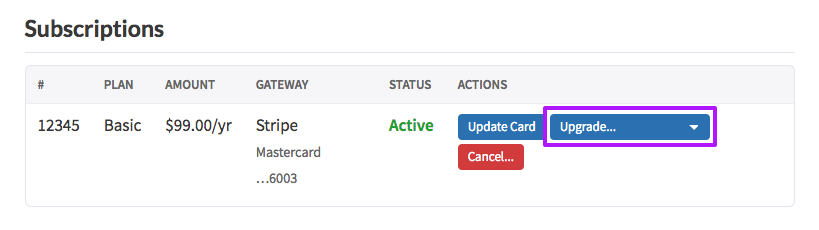
After selecting the desired plan in the dropdown, you’ll see a pop-up message with the calculated prorated amount, and the amount for future renewals. After confirming, the extra payment will be processed via Stripe (also if it was PayPal before), and your license plan and the allowed number of sites in your account will be updated.
Note that there is no 20% renewal discount applied when upgrading to a higher tier, only when an existing subscription is renewed automatically or manually.
Upgrade a PayPal subscription
The process for upgrading a PayPal subscription is the same as described above. However, it is impossible to automatically change a running PayPal subscription.
This means that running PayPal subscriptions will automatically be switched to Stripe when upgrading them to a higher tier.
When you click the “Upgrade…” button, you’ll see the same pop-up message as when using Stripe, with the calculated prorated amount, and the amount for future renewals. But after confirming, you will be redirected to Stripe to continue and choose a payment gateway. The extra payment (and future renewals) will be processed via Stripe, and your license plan and the allowed number of sites in your account will be updated. Your PayPal subscription will automatically be cancelled.
If, for some reason, you don’t want to switch to Stripe when upgrading, the only way is to cancel your license, and buy a new license for the desired plan. However, in this case, you’ll pay the full amount, without any prorated calculations.
Plugin updates
As long as your license is active, FacetWP will automatically notify you when new updates are available.
When your license expires, FacetWP will continue to work, but you will no longer receive plugin updates or support.
Solve plugin update issues
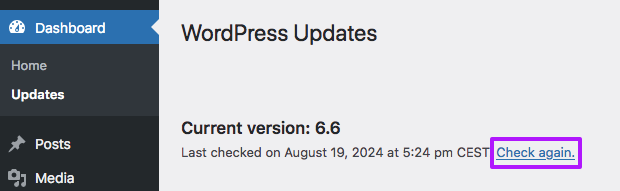
If updates aren’t appearing, click “Activate” within Settings > FacetWP > Settings, then click “Check again” within Dashboard > Updates. This clears WP’s updater cache and force-checks for plugin and WordPress updates.
If that doesn’t resolve the issue, check the following:
- Clear all caching and optimization plugins (WP Total Cache, WP Rocket, WP Super Cache, Autoptimize, etc).
- Some hosts (Pagely, WP Engine, Siteground, Flywheel, etc) and services (Cloudflare) provide server-side caching that may also need to be cleared.
Note that if you are using FacetWP in a WordPress multi-site setup, the update notifications only appear in: My Sites > Network Admin > Plugins.
Update from (very) old versions
If you experience (fatal) PHP errors when updating from (very) old plugin versions, try deleting the plugin folder entirely (locally and on your server), then add the new version and upload it.
We’ve specifically seen updating errors with versions older than v3.8 (2021).
Disable the admin notices to install add-on integrations
Since version 4.1.8 FacetWP displays admin notices when you have certain plugins installed and the necessary integration add-ons are missing.
These notices were added because many users are unaware of the fact that some plugins do not work with FacetWP unless the related add-on is installed. For example, WPML needs the Multilingual add-on installed to work with FacetWP.
There are certain situations however in which you don’t need the integration add-ons. In these cases you can permanently disable these notices by adding the following code to your (child) theme’s functions.php or the Custom Hooks add-on:
How to use custom PHP code?
PHP code can be added to your (child) theme's functions.php file. Alternatively, you can use the Custom Hooks add-on, or a code snippets plugin. More info
add_filter( 'facetwp_dismiss_notices', '__return_true' );