Indexing
During a process called indexing, FacetWP analyzes your site and stores facet data into a custom database table for quick lookups.
How to run the indexer
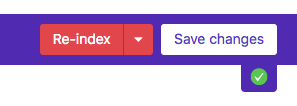
Whenever facets are added or edited, save your changes and then press the Re-index button. This completely rebuilds the index table.
If you press the Stop indexer button while the indexer is running, the index will remain incomplete until the next time you re-index.
While the indexer is running, you can click the rotating icon to see its progress.
It’s recommended to keep the FacetWP settings screen open while the indexer is running.
In some situations, it may be needed to trigger indexing programmatically or with a cron schedule.
When to run the indexer
Automatic indexing
FacetWP has an automatic indexer that performs a single re-index when an individual item (a post, page, and category or term name/slug) is edited or saved. This keeps the index up to date automatically without having to worry about it, and without putting the potentially heavy burden of a full re-index on your site. This means you don’t have to re-index after adding or editing/saving posts or terms, with a few exceptions.
It is possible to temporarily or permanently disable the automatic indexer, which can be useful in certain situations.
When to re-index
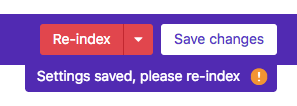
In general, FacetWP will let you know when you need to re-index, by displaying a message in the top right corner of the admin screen after you save facet settings.
Re-indexing is only needed:
- when facets are added.
- when facet settings have changed.
- when content is imported programmatically, for example with WP All Import or WebToffee Import Export for WooCommerce.
- when a category or term’s hierarchy has changed (e.g. changing to a new parent term).
- when a category or term’s custom field content has changed. (Terms can have custom fields added by Advanced Custom Fields or Pods).
- after adding (or changing) hooks that influence the indexing process, like
facetwp_index_row. - after making changes to the registered post types.
- after purging the index table.
- when/after solving indexing issues.
Other indexing actions
Stop indexer
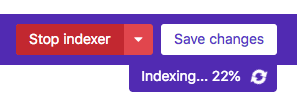
To stop a running indexer at any time in the process, just click “Stop indexer”.
You can stop safely at any time during the running indexing process. Stopping the indexer does not leave you with a partial index: FacetWP uses a temporary database table that is copied to the indexing table only after the indexing process has completely finished. Clicking “Stop indexer” just stops the running process and performs a cleanup of the temporary table.
Show indexer stats

Shows the last time a full re-index has successfully run.
Show indexable post types
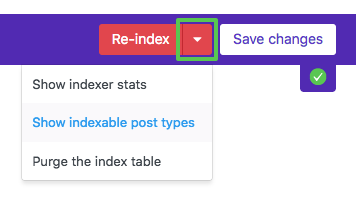
Lists all post types that will be indexed. If a desired post type is not in the list, read this section on how to fix this.
Purge the index table
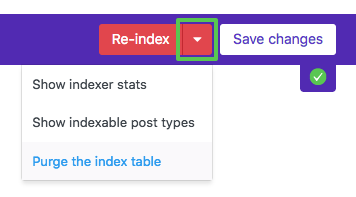
Deletes and re-creates the facetwp_index database table. This can be helpful in resolving database migration issues or sometimes with other issues like a “The index table is empty” error.
Make sure to re-index again after purging the index table.
How to trigger the indexer programmatically
FacetWP has an automatic indexer that performs a single re-index when an individual item (a post, page, and category or term name/slug) is edited or saved. This keeps the index up to date automatically without having to worry about it, and without putting the potentially heavy burden of a full re-index on your site.
There a several scenarios in which it is useful to programmatically trigger re-indexing, for individual posts or for all posts. See this page for all info and ways to do this.
In most of these scenarios, it is recommended to disable automatic indexing, to prevent interference by multiple indexing processes running at the same time.
Disable automatic indexing
FacetWP has an automatic indexer that performs a single re-index when an individual item (a post, page, and category or term name/slug) is edited or saved. This keeps the index up to date automatically without having to worry about it, and without putting the potentially heavy burden of a full re-index on your site.

Automatic indexing can be temporarily or permanently disabled with the “Enable automatic indexing” setting (introduced in version 4.3.4). This setting is enabled by default, and should be in most situations.
Disabling automatic indexing can be useful if you prefer to re-index manually with the Re-index button. Or if you want to run the indexer programmatically, directly with PHP, with a non-recurring WP-Cron event, periodically with the Schedule Indexer add-on (which works with WP-Cron), or with WP-CLI/server cron. Other reasons could be if you want to (temporarily) pause automatic indexing when importing content, or if you are testing custom indexing code.
Using the facetwp_indexer_is_enabled hook
Instead of using the setting, automatic indexing can also be disabled with the facetwp_indexer_is_enabled hook, by adding the following to your (child) theme’s functions.php. The code does exactly the same as disabling the setting. When this hook is in use, it overrides the setting:
How to use custom PHP code?
PHP code can be added to your (child) theme's functions.php file. Alternatively, you can use the Custom Hooks add-on, or a code snippets plugin. More info
add_filter( 'facetwp_indexer_is_enabled', '__return_false' );
Note that with this hook it is also possible to disable automatic indexing for certain types of content.
When the facetwp_indexer_is_enabled hook is used like above, the setting will display a warning, because in this scenario, the setting is ignored:

facetwp_indexer_is_enabled hook is in use. Fix indexing issues
FacetWP’s indexer is built to be very fast and reliable. However, indexing issues can occur in specific scenarios. See this page for the most common causes and fixes.
Improve indexing speed
If your website has a lot of content, indexing can take a long time. If you want to speed up the indexing process, see this section on our performance page about what influences the speed and some things you can do.
One simple way of speeding things up is to use the facetwp_indexer_query_args hook to limit indexing to the post types you are actually using with FacetWP. To check which post types FacetWP currently indexes, click the “Show indexable post types” button in the settings, as shown in the image on the right.
Customize what is being indexed
FacetWP has several indexing hooks that let you modify how FacetWP interacts with the facetwp_index table during the indexing process.
For example, the facetwp_indexer_query_args hook lets you customize which posts and post types get indexed.
Also check out the powerful facetwp_index_row hook, which lets you modify individual facet values before they are saved into FacetWP’s index table. See this explanation on the index table and how this works.
One application of the facetwp_index_row hook is indexing serialized data:
How to index serialized data
Using the facetwp_index_row hook, it’s possible to index custom fields stored as a serialized array.
Let’s say you have a facet named days_of_week that uses a custom field with the same name. In the database, an example postmeta row looks like this:
How to use custom PHP code?
PHP code can be added to your (child) theme's functions.php file. Alternatively, you can use the Custom Hooks add-on, or a code snippets plugin. More info
a:2:{i:0;s:6:"Monday";i:1;s:8:"Thursday";}
To index it, add the following code to your (child) theme’s functions.php, then hit the Re-index button.
How to use custom PHP code?
PHP code can be added to your (child) theme's functions.php file. Alternatively, you can use the Custom Hooks add-on, or a code snippets plugin. More info
function index_serialized_data( $params, $class ) { if ( 'days_of_week' == $params['facet_name'] ) { $values = (array) $params['facet_value']; foreach ( $values as $val ) { $params['facet_value'] = $val; $params['facet_display_value'] = $val; $class->insert( $params ); } return false; // skip default indexing } return $params; } add_filter( 'facetwp_index_row', 'index_serialized_data', 10, 2 );