Using the Listing Builder
What is the Listing Builder?
FacetWP’s Listing Builder allows you to quickly and visually design a results listing.
It’s a convenient alternative to building your own WP archive pages or Custom WP_Query loops.
After building the listing template, you can display it on any WordPress page with a shortcode, or include it in a template directly with PHP. Then put any number of facets on the page to interact with it.
It is even possible to have multiple listing templates on the same page: one being the dynamic listing that the facets on the page interact with, the others being “static” listings.
If you prefer to code your post loops and query arguments by hand, you can still take advantage of the Listing Builder by using its Dev mode.
Create a listing template
Browse to Settings > FacetWP, click the “Listings” tab and then “Add new”.
The Listing Builder is covered in the video below, starting at 1:49.
Using Dev mode
![]() New templates use the “visual” Listing Builder by default. However, if you need more flexibility and you’re experienced in WordPress coding, you can switch both the Display tab and Query tab independently from each other to “Dev mode”, by clicking the checkbox on the right.
New templates use the “visual” Listing Builder by default. However, if you need more flexibility and you’re experienced in WordPress coding, you can switch both the Display tab and Query tab independently from each other to “Dev mode”, by clicking the checkbox on the right.
In Dev mode, you can use PHP to build the listing template output and the query arguments.
Note that although you can freely switch each tab between the “visual mode” and Dev mode, the two modes are not related (except momentarily when you use the Convert to query args button). For the Display tab as well as the Query tab, a listing template uses one mode or the other: the mode in which you leave the tabs when you save the listing template, is used.
You can also mix modes. For example, you can use visual mode in the Display tab and Dev mode in the Query tab.
Naming your listings
In a listing’s settings, the “name” is what is shown in the gray input field:

The listing’s name is its technical name, used to identify it in code, for example in its shortcode.
The name field is automatically generated from the listing’s “Label” field (the input field to the left of it) when it is first entered. But you can easily change the name, for example to shorten or simplify it. The auto-generated or customized name is sanitized on auto-generation or after changing and saving. Special characters are removed, and spaces and dashes are replaced with underscores.
To prevent issues, make sure all your listings have a unique name. In FacetWP 4.5+, a numbered suffix is automatically appended when a duplicate name is detected. For example, when creating a second listing with the name new_template, the name field will automatically append a number: new_template_1.
Using the Query tab
The Query tab offers an easy visual alternative to manually building a WP query with PHP. You can define which results (posts or other post types) should be fetched in the initial post listing, before any filtering is applied by the user. You can also set the number of posts per page and the sorting method, and apply filtering rules to narrow the results.
Set the post types to fetch
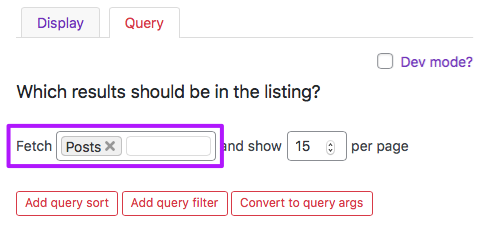
In the first line of the settings you can select one or more post types that have to be fetched.
Make sure that these post types are “searchable”, meaning that the exclude_from_search parameter of the register_post_type() function is set to false. Otherwise your posts will not get indexed.
Set the number of posts per page
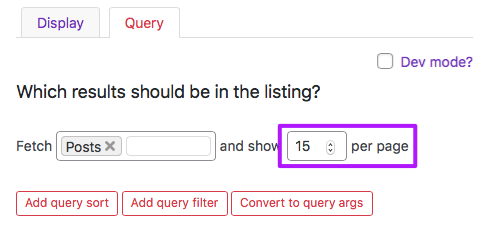
Next, if you intend to use pagination (for example with a Pager facet), set the number of posts per page.
It is advisable to set the number to something reasonable, like 15-20 posts max. This will reduce the number of queries needed to load the data for all displayed posts, which will speed up filtering. If you use -1, all posts will be retrieved. Use this only if you have a limited number of posts. If you leave the field empty, the default number of posts per page is 10.
Add query sorting rules
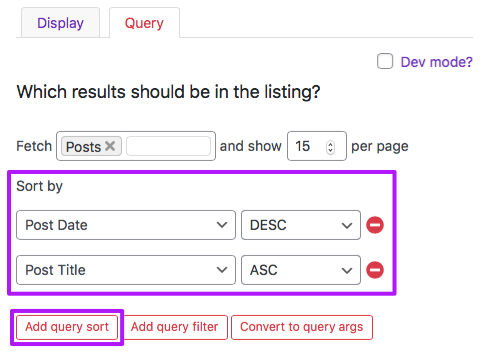
Click the “Add query sort” button to add a sorting rule. A sorting rule consists of a (custom) field to initially sort the listing by, and the sort order. ASC means ascending, e.g. A-Z. DESC means descending, e.g. Z-A.
The defined order determines the initial sort order (on page load or after using a Reset facet). If you add a Sort facet, you can offer the user other ways of sorting the listing.
You can add multiple sorting rules, by clicking the “Add query sort” button again. The sorting rules are applied in the order you define them, so subsequent rules can be used to apply a backup sort order. For example, if you want to sort by post date, but multiple posts share the same post date, you can sort by post date first, and by post title second.
To delete a sorting rule, click the red minus button on the right.
Add query filtering rules
Click the “Add query filter” button to add a filtering rule. With a filtering rule, you can narrow the posts that are shown in the listing.
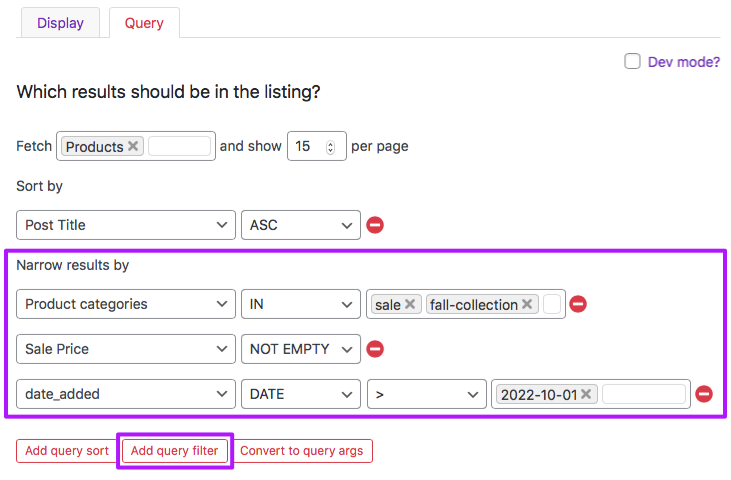
A filtering rule consists of:
- The (custom) field that will be used to compare against.
- A type selector (which appears for some customs fields). The possible values
TEXT,NUMERIC, orDATEdetermine which compare operators are possible, and the way the values will be compared. See below for more info about these field types. - A compare operator.
- One or more values to be used in the comparison.
You can add multiple filtering rules, by clicking the “Add query filter” button again. When multiple filtering rules are used, the logic operator between them is AND.
To delete a filtering rule, click the red minus button on the right.
Using compare operators
The table below gives an overview of the available compare operators and their behavior.
The available options depend on the type of source field you have selected. If you select a custom field as source, the options will depend on the field type you set: TEXT, NUMERIC, or DATE. For example, the > and < operators are not available when you use a custom field with TEXT set as its field type.
| Operator | Behavior if multiple values | Comparison description |
|---|---|---|
= |
OR |
The field EXISTS for the post, and the value IS [x] (OR [y]) |
!= |
AND |
The field EXISTS for the post, and the value is NOT [x] (AND is NOT [y]) |
> |
Only first value is used | The field EXISTS for the post, and the value is GREATER THAN [x] |
>= |
Only first value is used | The field EXISTS for the post, and the value is GREATER THAN OR EQUAL to [x] |
< |
Only first value is used | The field EXISTS for the post, and the value is LESSER THAN [x]. Note: posts for which the field exists but is empty are considered to have a value of 0, so they will appear with this comparison. |
<= |
Only first value is used | The field EXISTS for the post, and the value is LESSER THAN OR EQUAL to [x]. Note: posts for which the field exists but is empty are considered to have a value of 0, so they will appear with this comparison. |
IN |
OR |
The field EXISTS for the post, and the value is IN the list of values provided. Note: this is functionally the same as using the = operator with multiple values. |
NOT IN |
AND |
The field EXISTS for the post, and the value is is NOT IN the list of values provided. Note: this is functionally the same as using the != operator with multiple values. |
EXISTS |
n.a. | The field EXISTS for the post (and the value is empty or not empty). Note: that a field exists in the settings of e.g. Advanced Custom Fields or Custom Fields Suite, does not mean the field exists for each post. A post needs to be saved for a custom field to exist for that post. |
NOT EXISTS |
n.a. | The field does NOT EXIST for the post. E.g. because the post has not been saved: see EXISTS. |
EMPTY |
n.a. | The field EXISTS for the post and is EMPTY. |
NOT EMPTY |
n.a. | The field EXISTS for the post and is NOT EMPTY. |
Entering values to compare against
When adding values, make sure they are saved properly, otherwise the query filter will not work. Make sure that after entering a value, you always click the value in the dropdown that appears, or use “Enter”. A correctly entered value has an individual gray border and background with an “x” button. Click “Save changes” afterward.

Comparing text, numeric and date values
In most cases, if you select a custom field as source field, a type selector will appear. The options TEXT, NUMERIC, or DATE determine the field type and the comparison operators that can be used.

Comparing numerical values
If you set the field type to NUMERIC, you specify the comparison to be between numerical values. Numbers are internally compared as decimals (DECIMAL(16,4)), so you can compare numbers with a precision of up to 4 decimals.
Note that the decimals in the source field and the comparison values both need to have a dot as decimal separator. Currently, FacetWP’s “Separator” setting is ignored in these comparison rules. A comma will not work: decimals behind a comma are ignored: 10,3 is interpreted as 10, both for the source field and for the values to compare against.
Comparing date values
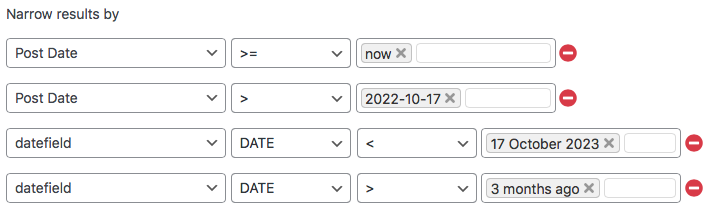
If you want to narrow the post listing by using dates, there are only four comparison operators available: <, <=, >, and >=. In these, < means: before a certain date, and > after a certain date.
For the source field, you can use the Post Date, or any other custom field, as long as you set the field type selector to DATE.
The date value in the selected source field needs to be in “YYYY-MM-DD” format (Y-m-d in PHP).
The date value you are entering yourself on the right side of the filtering rule, can be any valid date/time date format that is accepted by PHP’s strtotime() function. Of course,YYYY-MM-DD will work, but a lot of other formats will work too, including relative formats. So these will all work (individually):
Using dynamic URL tags
In the value field of a listing’s query filtering rule, you can use so-called “dynamic URL tags”. Dynamic URL tags can pull query filter values from the current page URL and pass them to the listing’s query parameters. There are two types of URL tags:
http:uri– resolves to one or more segments of the page URI (e.g.city/amsterdam). Thehttp:uritag makes it possible to use the same listing on different pages, with its query adapting itself automatically to the page URI.http:get– resolves to one or more of theGETvariables in the URL (e.g.?city=amsterdam). Thehttp:gettag can automatically pre-filter the base query of the listing on a page based on the GET variables added to the (incoming) URL.
Below is a compact explanation of these tags, with a basic example for each. Check out our extensive tutorial on using dynamic URL tags for all applications, more examples, how to use taxonomy-based fields, serialized fields, multiple tags, and how to use URL tags in Dev mode and on archive templates.
The http:uri tag
The http:uri URL tag gives access to the “URI” of the page. The URI is the part of the URL after the domain name, and without the beginning and ending slashes.
Say you have this URL:
https://facetwp.com/demo/state-parks/
Then the URI is: demo/state-parks. This URI has two “segments”: demo and state-parks, separated by a /.
The whole URI, and each of its segments, can be accessed with the http:uri URL tag:
| Tag | Resolves to | Example |
|---|---|---|
http:uri |
The full URI. | demo/state-parks |
http:uri:N |
The N-th path segment, split on /, starting at 0. |
http:uri:0 → demohttp:uri:1 → state-parks |
http:uri:-N |
Same, but the segment counted from the end (negative index); -1 is the last segment of the URI. Generally safer than using a positive number (see the banner below). |
http:uri:-1 → state-parks |
For example, say you have a directory site with a venue post type containing venues in The Netherlands. Each city has its own page, with URLs like /guides/amsterdam/, /guides/utrecht/, and /guides/the-hague/. Each of these is a real WordPress page, with its own intro copy, images, and specific layout. Below the editorial content, every page has a Listing Builder listing of venues in that city.
If there are a lot of city pages, it would be impractical to create a separate listing for each. Using a dynamic URL tag, you can create one listing and re-use it on each city page. The listing retrieves all venue posts, pre-filtered by city, by the URL tag that pulls the city name from the URI.
To link the city in the page URI to the venue posts, these posts need a custom field city, set to the venue’s city. Then you create a filter rule based on that custom field. In the filter rule, you can use the http:uri:-1 tag to dynamically filter the listing query to the last item in the URI, which is the name of the city.
On the page with the URI guides/amsterdam, the tag http:uri:-1 will resolve to amsterdam, and on guides/utrecht, it will resolve to utrecht:

http:uri:-1 dynamic URL tag in a custom-field-based listing query filter.So with this URL tag in place, a listing retrieving venue posts will show venues in Amsterdam on the /guides/amsterdam/ page, and venues in Utrecht on the /guides/utrecht/ page, etc. Any facets on these pages can be used on top of this “base” query.
See our extensive tutorial on using dynamic URL tags for all applications, more examples, how to use taxonomy-based fields, serialized fields, multiple tags, and how to use URL tags in Dev mode and on archive templates.
The http:get tag
The http:get URL tag gives access to the GET variables in the URL. The GET or query variables are parts of the URL after the ?. For example, this URL has one GET variable:
https://facetwp.com/demo/state-parks/?type=reserve
Each GET variable has a name (in this example type) and a value (in this example reserve).
The http:get tag can be used as follows:
| Tag | Resolves to | Example |
|---|---|---|
http:get:name |
The name of a query variable in the URL. |
http:get:state → oregonhttp:get:type → reserve |
For example, say you have a /guides/ page with all venues in The Netherlands. On the site’s front page, you have a section with buttons for each city: Amsterdam, The Hague, Utrecht, etc. Each of the buttons links to the same /guides/ page with a GET variable: /guides/?city=amsterdam.
To get the listing on this /guides/ to only show venues in the city in the incoming link, each venue post needs a custom field city set to the venue’s city. Then you can create a query filter rule that uses a http:get:city URL tag to resolve to the city GET variable in the URL:

http:get dynamic URL tag in a custom-field-based listing query filter.So with this URL tag in place, a listing retrieving venue posts, on the /guides/ page will show venues in Amsterdam when the clicked front-page button linked to /guides/?city=amsterdam, and venues in Utrecht when the clicked button linked to /guides/?city=utrecht, etc. Any facets on the page can be used on top of this “base” query.
See our extensive tutorial on using dynamic URL tags for all applications, more examples, how to use taxonomy-based fields, serialized fields, multiple tags, and how to use URL tags in Dev mode and on archive templates.
Fix issues with (ACF) serialized field values
For certain types of custom fields, the options in the query filter interface are not enough. If your chosen field stores its values as a serialized string, the compare operators will not work.
One example of such a field is Advanced Custom Fields’ Checkbox field. See the ACF page for instructions on how to get a serialized field working with the Listing Builder’s query settings. The described solution will work for Checkbox fields as well as other fields with serialized values.
Convert to query arguments
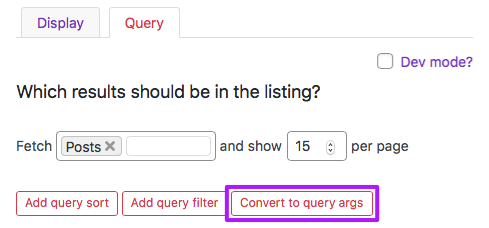
When you click the “Convert to query args” button, the Query tab is switched to “Dev mode” and the setting you have entered are converted to PHP query arguments.
In Dev mode, you can manually adapt the converted query arguments and add others.
This can be useful if your desired query is more complicated and you want to manually build a query with WP_Query arguments that are not covered in the Listing Builder’s settings.
Be aware that the button works only one way: it converts the visual settings to PHP code only at the moment you click. You can switch back to visual mode, but the two modes are independent. The mode you leave the Query tab in when you click “Save changes” is the mode that will be used for the listing template’s query.
Using dynamic tags
Within the Listing Builder you can use so-called “dynamic tags”, which are very useful in building more sophisticated layouts of the retrieved individual posts. A dynamic tag lets you pull in all kinds of post data, to be used in for example an HTML builder item or in a builder item’s setting field.
Besides the set of built-in tags the Listing Builder comes with, you can use your own tags, created from custom fields within the Listing Builder itself.
For more complex needs it is also possible to create custom tags by modifying the output of existing tags or by writing them from scratch.
Built-in dynamic tags
The following built-in tags are available:
| Tag | Output |
|---|---|
{{ post:id }} |
Returns the post’s id |
{{ post:title }} |
Returns the post’s title |
{{ post:name }} |
Returns the post’s name (slug) |
{{ post:type }} |
Returns the post’s type |
{{ post:url }} |
Returns the post’s url |
{{ post:image }} |
Returns the post’s featured image URL (in “full” size). If you need another WordPress image size, you can can use the facetwp_builder_dynamic_tag_value hook. |
Create dynamic tags within the Listing Builder
By creating a dynamic tag in the Listing Builder itself, you can pull in a post’s custom field value into a builder item’s field or setting.
The way this works is that you create a hidden builder item from the custom field you want to pull the value from, and use its “Unique name” as the dynamic tag name, to be used in other builder items’ fields. This may sound complicated but it’s actually very easy:
Let’s say you have a photo_url custom field and you want to wrap it into an <a> tag:
- First, add a new builder item and select the desired field:
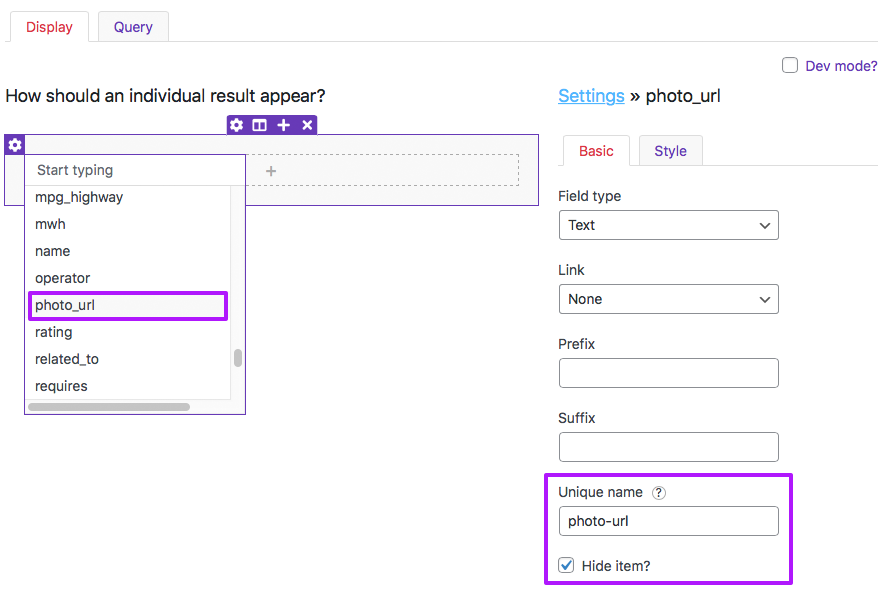
- Next, enter
photo-urlin the builder item’s “Unique name” field and click the “Hide item” checkbox. In the builder, the item will become grayed out with a “hidden” icon next to it, and this item will be hidden on the front-end. We hide it because this builder item is only used to generate the dynamic tag: the content of its “Unique name” field becomes the dynamic tag:{{ photo-url }}. - Finally, add a new HTML builder item and set its “Content” to:
<a href="{{ photo-url }}">{{ photo-url }}</a>
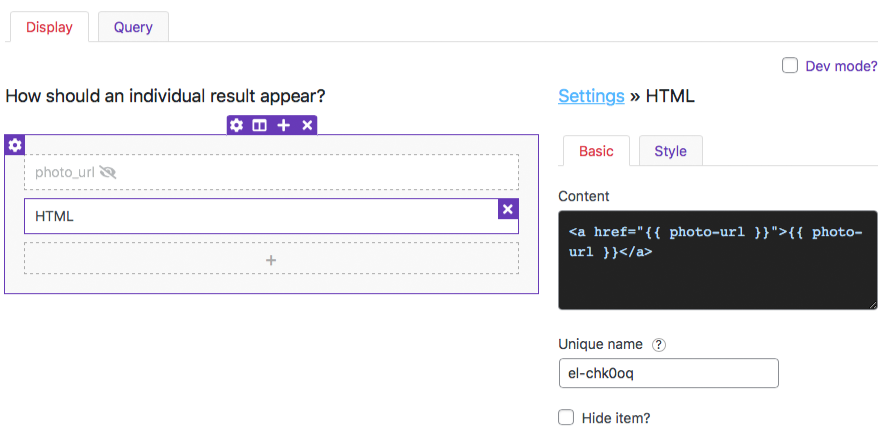
FacetWP will now automatically replace all instances of {{ photo-url }} with the custom field’s value. You can even pull in multiple fields.
Create or modify custom dynamic tags
It is also possible to modify existing dynamic tags or create your own custom tags from scratch.
There are two hooks available for this (with the second one being the more efficient of the two):
You could for example create a tag to pull in content from a custom field and modify it. Or a tag to output the featured image url in any (default or custom) WordPress image size.
Besides modifying the output of built-in tags, you can also modify the dynamic tags you made within the Listing Builder itself. An example of this would be to modify a dynamic tag that pulls in data from a Price custom field, so that the output value of the tag is prepended with a currency sign.
See the above hook pages for more examples.
Display a listing template
There are multiple ways to display a Listing Builder listing template on your page. You can copy its shortcode and place it in several ways. Or you can use PHP, or use an Elementor FacetWP Listing widget.
Copy the shortcode
![]()
![]() After creating the listing template, click the red “Copy shortcode” button.
After creating the listing template, click the red “Copy shortcode” button.
It’s also possible to copy shortcodes directly from the Listings screen. Click the cog/gear icon on the right side of the listing’s row and click “Copy shortcode” in the dropdown.
You can also create your shortcode manually, using the listing name (the name in the grey box). Each listing’s shortcode looks like this:
How to use shortcodes?
Shortcodes can be placed directly in post/page edit screens. You can also add them in text/HTML widgets. The WordPress Block Editor has a Shortcode block to place them in. And most Page builders have a dedicated shortcode module/widget. In PHP templates, shortcodes can be displayed with WP's do_shortcode() function:
echo do_shortcode('[my-shortcode]');. More info[facetwp template="the_listing_name"]
Place the shortcode
Paste the shortcode into the body field of your page, or into a Text widget (Appearance > Widgets).
If you are using the WordPress block editor, you can also paste shortcodes into a Shortcode block.
And if you are using a supported page builder, you can paste shortcodes in a Shortcode or HTML module/widget. For example in an Elementor Shortcode widget.
Display a listing template with PHP
Instead of with a shortcode, listing templates can also be placed directly in your page template (or PHP include) with the facetwp_display() function:
How to use custom PHP code?
PHP code can be added to your (child) theme's functions.php file. Alternatively, you can use the Custom Hooks add-on, or a code snippets plugin. More info
echo facetwp_display( 'template','the_listing_name' );
You can also output listing shortcodes directly in your PHP templates, with WordPress’ do_shortcode() function:
How to use custom PHP code?
PHP code can be added to your (child) theme's functions.php file. Alternatively, you can use the Custom Hooks add-on, or a code snippets plugin. More info
echo do_shortcode( '[facetwp template="the_listing_name"]' );
Display a listing template with an Elementor FacetWP Listing widget
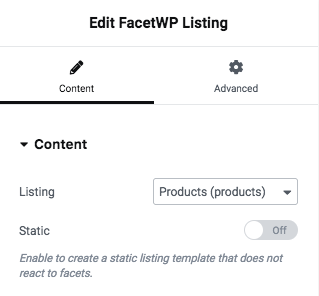
If you are using Elementor, and have the Elementor add-on installed, you can also use the FacetWP Listing widget to place a Listing Builder listing template on your page.
After adding the widget to your page, use the “Listing” setting dropdown to select one of your previously created listings.
The Listing widget will show your listing, including its full layout, in the Elementor editor.
Note that facets can also be placed with Elementor, using the FacetWP Facet widget.
Adding static listings templates with an Elementor FacetWP Listing widget
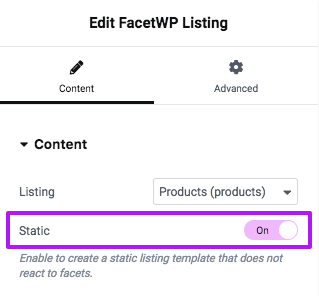
You should add only one filterable Listing widget to a page.
If you need more listings, you can add one or more non-filterable “static” listings.
Using Elementor, these can be added by enabling the “Static” toggle in the FacetWP Listing widget.
Where to place the listing template?
If you place the listing template shortcode (or PHP code, or Elementor Listing widget) and your facets on a single page or post, your facets will just work.
But if you place the listing on a WP archive page, things will not function correctly out of the box. See below for a few options to get this working.
If you are unsure what a WP archive is, or how to determine if you are using one, read this.
Using a Listing Builder listing template on a WP archive
Generally, on WP archive pages, it would be better not to use a Listing Builder listing template, but to use the WP archive template query itself. But if you don’t want or cannot change the way things are set up, and want to keep using a Listing Builder listing template on a WP archive page, you have to tell FacetWP explicitly which query (not) to use.
FacetWP has built-in query detection that determines which query on the page is the main query to use for filtering. On WP archive pages, FacetWP by default will always prioritize the archive query ahead of any other query on the page, including the query of the Listing Builder listing template you placed on that page. This is the reason why a Listing Builder listing template on a WP archive will lead to unexpected results: FacetWP is using another query than the one defined in the Listing Builder.
There are a few possible approaches to this situation:
Option 1: Ignore the archive query
The first option is to use the facetwp_is_main_query hook to force FacetWP to ignore the archive query, and use the Listing Builder’s listing query instead. Add the following code to your (child) theme’s functions.php to do this:
How to use custom PHP code?
PHP code can be added to your (child) theme's functions.php file. Alternatively, you can use the Custom Hooks add-on, or a code snippets plugin. More info
add_filter( 'facetwp_is_main_query', function( $is_main_query, $query ) { if ( $query->is_archive() && $query->is_main_query() ) { $is_main_query = false; } return $is_main_query; }, 10, 2 );
Option 2: Pre-filter results based on the archive query
The second option, which only works on category, tag, taxonomy term, author, and search archive pages, is to use the Listing Builder listing template but let FacetWP pre-filter its query with the current category, tag, term, or search term(s) from the archive itself.
This can be done by adding the facetwp_template_use_archive hook to your (child) theme’s functions.php. See that hook’s page for detailed info about using this approach.
For example, on the category.php archive template, you could place a Listing Builder listing template that fetches posts. Without this hook, on the /category/events archive page, after using facets, the filtered results will be fetched from all posts, including posts that do not have the category ‘events’. With this hook in place, the results will only contain posts within the category ‘events’.
Similarly, consider a search results page based on the search.php template that contains a Listing Builder listing template that fetches products. Without this hook, on the search results page with the URL /?s=hoodies, selecting facet choices will generate results from all products, including those that do not contain the search term ‘hoodies’. With this hook in place, the results will be pre-filtered with that search term, so users can use the facets on the page to further ‘drill down’ into those results.
Option 3: Pre-filter results based on the page URI
Instead of pre-filtering the listing based on the archive query that the listing is on, with the facetwp_template_use_archive hook (option 2 above), you can also pre-filter the listing query based on the page URI of the archive page.
This can be done with a so-called dynamic URL tag. See this section in our tutorial on dynamic URL tags for how to do this exactly.
In general, for Listing Builder listings placed on archives, we recommend using the facetwp_template_use_archive hook, because it is only one line in your functions.php and works for all types of archives. Using a dynamic URL tag can be useful if you want to build complex queries in the Listing Builder, instead of customizing the native archive query with a pre_get_posts hook.
Option 4: Use the archive query itself
Last but not least, if you are deliberately placing facets on a WP archive page, instead of using a Listing Builder listing template, you could consider using the native WP archive query and loop instead.
On a WP archive FacetWP will auto-detect and use the archive’s native query. Just place some facets on the page and they will work. And if you need to customize the native archive query, you can easily adapt it with WP’s pre_get_posts filter.
Multiple listing templates on the same page
Introduced in FacetWP v4.0 is the possibility to add more than one listing template to the same page.
Each listing template can have its own grid layout, styling, and query. But only one of them can be “dynamic” and will react to the facets on the page. The others have to be “static” listing templates and will not react to facets.
Display static listing templates
Static listing templates can be added with a shortcode similar to dynamic templates, but with an extra “static” attribute:
How to use shortcodes?
Shortcodes can be placed directly in post/page edit screens. You can also add them in text/HTML widgets. The WordPress Block Editor has a Shortcode block to place them in. And most Page builders have a dedicated shortcode module/widget. In PHP templates, shortcodes can be displayed with WP's do_shortcode() function:
echo do_shortcode('[my-shortcode]');. More info[facetwp template="the_listing_name" static]
Static listing templates can also be placed directly in your WordPress archive templates, custom templates or includes, with PHP:
How to use custom PHP code?
PHP code can be added to your (child) theme's functions.php file. Alternatively, you can use the Custom Hooks add-on, or a code snippets plugin. More info
echo facetwp_display( 'template','the_listing_name', [ 'static' => true ] );
If you are using Elementor, you can add static listings by using a FacetWP Listing widget with the “Static” toggle enabled.
Using (static) listings without facets
From version 4.3.5, FacetWP is not loading unneeded JS, CSS, and JSON assets anymore when there is/are only one (or more) static listing template(s) on the page, without a “normal” non-static listing template.
So if you only need a listing template on a page, without any facets, the recommendation is to set this listing to static, to prevent unnecessary loading of all assets.
Note that, starting from version 1.9.3 of the Elementor add-on, it is also possible to add static listings with a FacetWP Listing widget.
How to duplicate a listing template
 Since FacetWP v4.0 it is very easy to clone/duplicate a listing template, including all its settings:
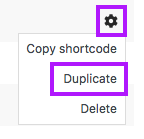
Go to Settings > FacetWP and click the Listings tab. On the right side of the listing template that you want to clone, click the cog/gear icon and click “Duplicate”. This instantly creates a full copy of the listing template and its settings, with the label and facet name having the word “copy” added.
You can then change the new template’s label, name and settings and click “Save changes”.
Responsive support

A Listing Builder listing will have as many grid columns as set in its “Number of grid columns” setting, as shown in the image on the right.
If the browser window’s width is decreased (or if the page is opened in a smaller screen, like on mobile), the listing’s grid layout will automatically change to 1 column, at exactly 480px. This happens because its default CSS has one so-called “breakpoint”, set with a “media query” at max-width: 480px. This means that if the window width is <= 480px, the grid layout follows the CSS set for it, as shown below in lines 24-29.
You can add additional breakpoints with some custom CSS, and determine the number of grid columns (and any other layout changes you want to happen) at that width.
For example, add the following code to your (child) theme’s functions.php to add an additional breakpoint at max-width: 980px to switch the layout to 3 columns if the browser width is <= 980px. This is set in lines 6-12.
This example also shows how to add additional breakpoints, as many as you want. It adds a third one at max-width: 780px in lines 15-21, to set the grid layout to 2 columns.
If you want to keep the default breakpoint at 480px, it must be included in the snippet, as shown in lines 24-29. This is because we load this snippet in the footer with the facetwp_scripts hook, so it will override the default listing CSS that is loaded inline. Due to the cascading (overriding) nature of CSS, if you would not include the default breakpoint, the listing would display with 2 columns below 780px and would ignore the breakpoint at 480px.
Another thing to look out for is the order of the breakpoints. When using max-width in the @media media query, the breakpoints must be ordered from high to low. In theory, you could also use min-width (called a “mobile first” approach), for which the order would have to be low to high.
How to use custom PHP code?
PHP code can be added to your (child) theme's functions.php file. Alternatively, you can use the Custom Hooks add-on, or a code snippets plugin. More info
add_action( 'facetwp_scripts', function() { ?> <style> /* Add a custom breakpoint */ @media (max-width: 980px) { body .facetwp-template .fwpl-layout, body .facetwp-template-static .fwpl-layout { grid-template-columns: repeat(3, 1fr); /* 3 columns */ grid-gap: 20px; /* Optional: change the spacing at this breakpoint */ } } /* Optional: add more custom breakpoints */ @media (max-width: 780px) { body .facetwp-template .fwpl-layout, body .facetwp-template-static .fwpl-layout { grid-template-columns: repeat(2, 1fr); /* 2 columns */ grid-gap: 30px; /* Optional: change the spacing at this breakpoint */ } } /* The default breakpoint must be included if this snippet is loaded in the footer with 'facetwp_scripts' */ @media (max-width: 480px) { body .facetwp-template .fwpl-layout, body .facetwp-template-static .fwpl-layout { grid-template-columns: 1fr; /* 1 column*/ } } </style> <?php }, 100 );
Align the last item to the bottom
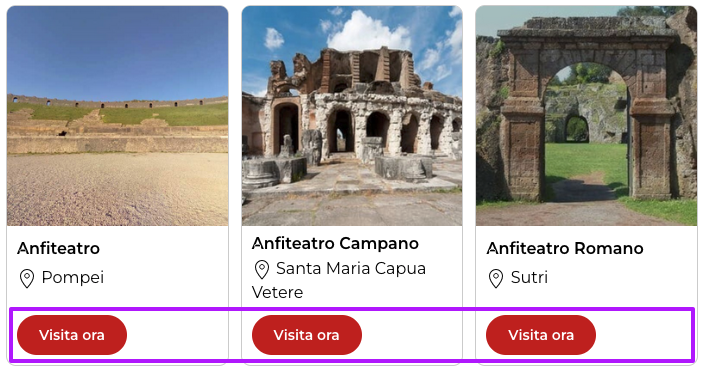
An often-asked question is how to align the last item to the bottom of the post item in a (simple) Listing Builder listing. Usually, the last item is a button, like in the image to the right.
The answer depends on the complexity of the layout, but if you have a simple column of builder items, all in one row, you can use the following CSS to align the last item to the bottom. It sets the (single) row to 100% of the height of the post item container, displays the child column as a grid, and aligns the last item in that column to the bottom:
How to use custom PHP code?
PHP code can be added to your (child) theme's functions.php file. Alternatively, you can use the Custom Hooks add-on, or a code snippets plugin. More info
add_action( 'facetwp_scripts', function() { ?> <style> .fwpl-row { height: 100%; } .fwpl-col { display: grid; } .fwpl-item:last-child { align-self: end; } </style> <?php }, 100 );
Hide empty items
The layout builder automatically adds the CSS class is-empty to any items that contain no value. You could use this (within your theme’s style.css) to hide these empty container elements with CSS, e.g.
How to use custom CSS?
CSS code can be placed in your (child) theme's style.css file. Alternatively, you can add it manually between
<style>tags in the<head>section, in your (child) theme's header.php file. You can also load it with a hook in your (child) theme's functions.php file, or in the Custom Hooks add-on. To load the code only on pages with facets, use thefacetwp_scriptshook. To load it on all pages, usewp_headorwp_footer. Or you can use a code snippets plugin. More info.fwpl-item.is-empty { display: none; }
Use shortcodes in builder items
A handy feature worth mentioning is that you can use shortcodes in builder items. FacetWP will automatically parse shortcodes in “Post Content” and “HTML” builder items.
In other builder item types, like “Post Title”, “Post Excerpt”, or items based on a custom field, you need to explicitly tell FacetWP to parse shortcodes, using the facetwp_builder_item_value hook.
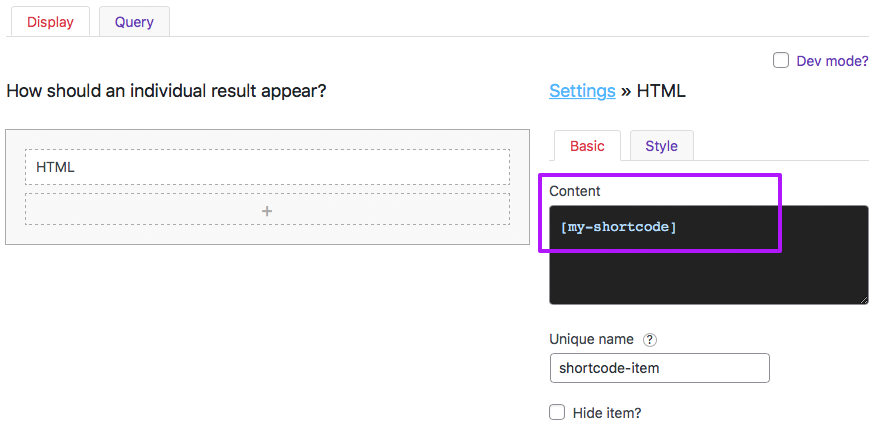
Use shortcodes in HTML builder items
Shortcodes added to the “Content” field of an HTML builder item will automatically be parsed when the listing template is displayed:
Add links to builder items
In a post listing or grid, you’d usually want to link each post item (or elements of it, like the post title or a “read more” link) to the post’s permalink. In the Listing Builder, there are a few ways to do this:
Add links with a setting
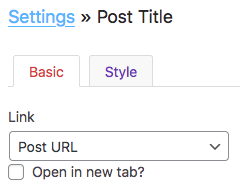
The following types of builder items have their own “Link” setting which you can use to link the item to the post URL (or a custom URL):
- Button
- Featured image
- Post Title
- Custom fields (standard custom fields, not fields made with Advanced Custom Fields or Pods)
If you are using a builder item without a “Link” setting, you can use any of the following solutions:
Add links with the Prefix and Suffix settings
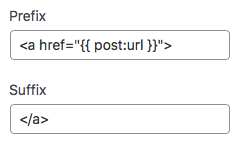
Most builder item types have a “Prefix” and “Suffix” setting. These two setting fields accept HTML, and thus can be used together to wrap a link tag around the item. To dynamically output the URL to the post, you can use the built-in {{ post:url }} dynamic tag.
So, to add a complete link, add <a href="{{ post:url }}"> to the “Prefix” field, and </a> to the “Suffix field, as shown in the image on the right.
Add links with an HTML builder item
Another approach would be to use an HTML builder item. These can be very useful if you want to include the contents of one or more custom fields from Advanced Custom Fields or Pods in your item, or if your builder item is more complex. HTML items can be extra powerful if you combine them with built-in or custom dynamic tags.
An example: let’s say you want to create a link to the post URL, with the link text coming from an ACF custom field:
- First, click the “+” icon and create a builder item from your ACF field. Give the item a name with the “Unique name” field (or use the generated name), and enable the “Hide item” setting (to prevent it from being displayed itself):
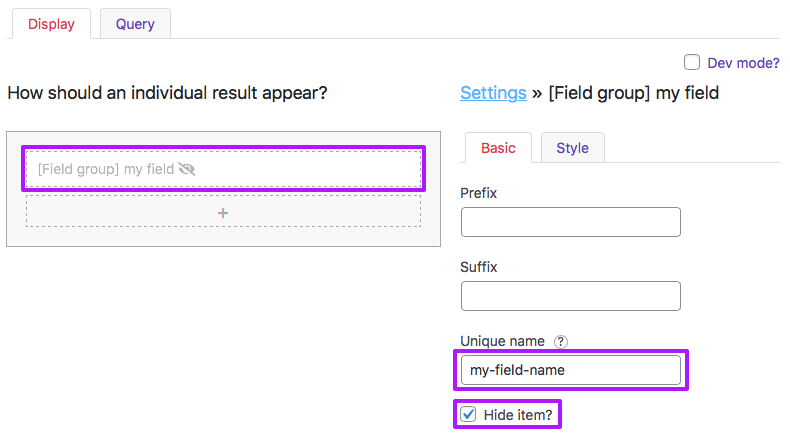
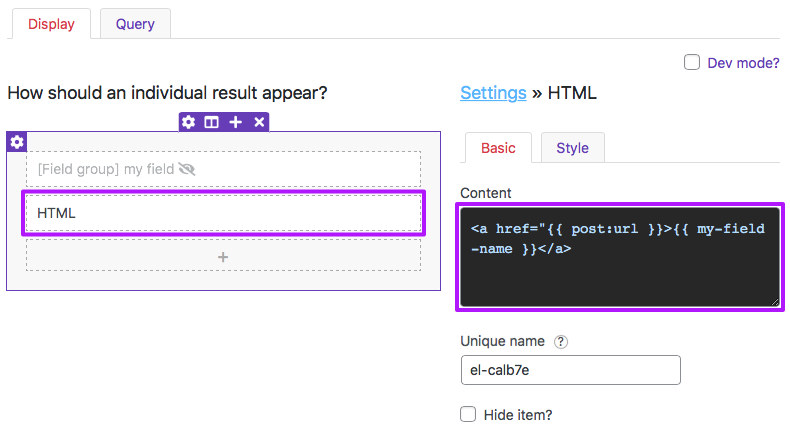
- Then, add an HTML builder item, and use its “Content” field to create a link element. For the link URL in the
hrefattribute, use the built-in{{ post:url }}dynamic tag. For the link text, use the “Unique name” of the builder item created in the first step. This name can be used as a custom dynamic tag by wrapping it with double curly brackets:{{ my-field-name }}:
<a href="{{ post:url }}">{{ my-field-name }}</a>
The settings then should look like this:
Add links with the facetwp_builder_item_value hook
It’s also possible to use the facetwp_builder_item_value hook to add links:
Add a link to each builder item
For example, you could add a link to each builder item, like this:
How to use custom PHP code?
PHP code can be added to your (child) theme's functions.php file. Alternatively, you can use the Custom Hooks add-on, or a code snippets plugin. More info
add_filter( 'facetwp_builder_item_value', function( $value, $item ) { return '<a href="' . get_permalink() . '">' . $value . '</a>'; }, 10, 2 );
Obviously, don’t do this when one or more of your builder items already have a link (created with one of the methods above), or you’d get invalid, nested link tags.
Add a link to a specific builder item
The above example can be adapted to only add a link to one specific builder item, identified by its “Unique name”. Note that you can also use dynamic tags in the code. To illustrate this, in the example below we used a built-in dynamic tag for the post URL, instead of get_permalink():
How to use custom PHP code?
PHP code can be added to your (child) theme's functions.php file. Alternatively, you can use the Custom Hooks add-on, or a code snippets plugin. More info
// replace 'my-item-name' with the name of your builder item add_filter( 'facetwp_builder_item_value', function( $value, $item ) { if( $item['settings']['name'] == 'my-item-name' ) { return '<a href="{{ post:url }}">'. $value. '</a>'; } return $value; }, 10, 2 );
Add a read more link to a Post Excerpt builder item
This example takes a Post Excerpt builder item, trims it to 8 words, then adds an ellipsis between parentheses (…) and a “read more” link to the post URL:
How to use custom PHP code?
PHP code can be added to your (child) theme's functions.php file. Alternatively, you can use the Custom Hooks add-on, or a code snippets plugin. More info
add_filter( 'facetwp_builder_item_value', function( $value, $item ) { if ( 'post_excerpt' == $item['source'] ) { $length = 8; // set the number of words $more = '<a href="' . get_permalink() . '" class="readmorelink"> (…) read more</a>'; // Append an ellipsis with a read more link to the post URL $value = wp_trim_words( $value, $length, $more ); } return $value; }, 10, 2 );
Add a post author link to a Post Author builder item
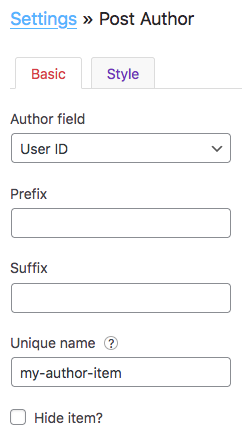
The following example shows how to add a post author link to a Post Author builder item.
First, set your Post Author Listing Builder item’s ‘Author field’ setting to ‘User ID’, as shown in the image on the right. Also give the item a unique name.
Then add the following snippet to your (child) theme’s functions.php, and replace my-author-item with the ‘Unique name’ of your Post Author builder item:
How to use custom PHP code?
PHP code can be added to your (child) theme's functions.php file. Alternatively, you can use the Custom Hooks add-on, or a code snippets plugin. More info
// Set your Post Author Listing Builder item's 'Author field' setting to 'User ID' // Replace 'my-author-item' with the 'Unique name' of your Post Author builder item add_filter( 'facetwp_builder_item_value', function( $value, $item ) { if( $item['settings']['name'] == 'my-author-item' ) { $author_id = $value; $author_link = get_author_posts_url( $author_id ); $author_name = get_the_author_meta( 'display_name', $author_id ); return '<a href="' . $author_link . '">'. $author_name . '</a>'; } return $value; }, 10, 2 );
Add a link to the whole post item block
Each post in a post listing normally consists of several builder items. For example, a post block could consist of a post title, a featured image, and an excerpt item.
With all of the above methods you can add links to individual builder items, like the post title. But what if you want to add a link to the whole post block instead of to the individual builder items it consists of?
There are two ways of accomplishing this:
Build the whole post block in one HTML builder item
One approach is to build the whole post block in one HTML builder item and use the {{ post:url }} built-in dynamic tag to add a link to the surrounding <a> tag.
Then use one or more other builder items for everything you want displayed within the link, by using their “Unique name” as custom dynamic tag. Make sure to set each of these builder items to be hidden, so they are not displayed in the listing.
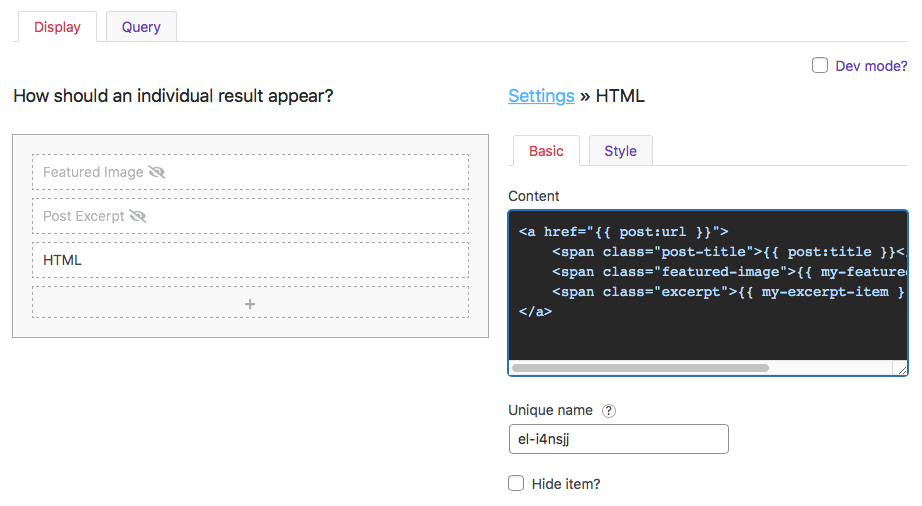
The following example code for a HTML item generates the post title, the featured image and the excerpt inside the link. It assumes two hidden builder items: one for the featured image and one for the excerpt. The {{ post:title }} dynamic tag is already built-in.
<a href="{{ post:url }}">
  <span class="post-title">{{ post:title }}</span>
  <span class="featured-image">{{ my-featured-image-item }}</span>
  <span class="excerpt">{{ my-excerpt-item }}</span>
</a>
Using this code, the template settings would look like this:
Link the whole post block with Javascript
Another approach is to link only one of the builder items, for example the post title, using any of the above methods. Then, we can use a bit of JavaScript to find that link and use it in a click event attached to the whole post block (which has the fwpl-result class).
The following example shows how to do this. The code assumes that the post block has a builder item with the “Unique name” my-item-name, which contains a link:
How to use custom PHP code?
PHP code can be added to your (child) theme's functions.php file. Alternatively, you can use the Custom Hooks add-on, or a code snippets plugin. More info
// replace 'my-item-name' with the name of your linked builder item add_action( 'facetwp_scripts', function() { ?> <script> (function($) { $('.facetwp-template').on('click', '.fwpl-result', function() { window.location.href = $(this).find('.my-item-name a').attr('href'); }); })(fUtil); </script> <?php }, 100 );
Now each whole post block links to its post URL. The only issue left is that when you hover over the post block, it does not look or behave like a link: the cursor does not change, and there is no feedback for the user that this is actually a link.
We can fix this with a few lines of CSS. The example code below applies a light gray background when hovering the post block, and sets the cursor to look like it is a real link:
How to use custom CSS?
CSS code can be placed in your (child) theme's style.css file. Alternatively, you can add it manually between
<style>tags in the<head>section, in your (child) theme's header.php file. You can also load it with a hook in your (child) theme's functions.php file, or in the Custom Hooks add-on. To load the code only on pages with facets, use thefacetwp_scriptshook. To load it on all pages, usewp_headorwp_footer. Or you can use a code snippets plugin. More info/* Style the hover behavior of each post block */ .facetwp-template .fwpl-result:hover { background: #eee; cursor: pointer; } /* Optional: (re)style the hover of the only link */ .facetwp-template .fwpl-result:hover .my-item-name a { color: red; text-decoration: none; }
Using builder items with dates
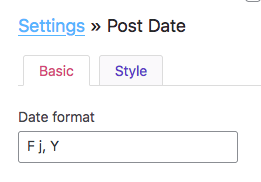
If you create a builder item based on the Post Date, or a date-based custom field (with the “Field type” setting set to “Date”), you’ll see a “Date format” setting. This setting determines the date output in the front-end. The default format is set to F j, y, will display the item as e.g. “January 18, 2025”.
The following PHP datetime formats can be used to customize the date format:
d– day (2 digits)j– day (without leading zeros)m– month number (2 digits)n– month number (without leading zeros)F– month (full)M– month (short)y– year (last 2 digits)Y– year (full)
Some examples:
Y-m-d– 2025-01-18d/m/Y– 18/01/2025F j, Y– January 18, 2025j M Y– 18 Jan 2025
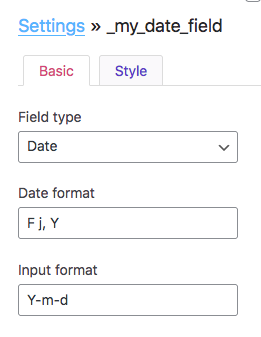
If the builder item is based on a custom field containing a date, and the “Field type” setting is set to “Date”, you can also set an “Input format”. This format should match the format in which the date is stored in the database. In most cases dates are stored as YYYY-MM-DD, for which the setting should be set to Y-m-d (which is the default). If your custom field stores the date differently, you need to adapt the “Input format” accordingly, using PHP datetime formats.
Limit the number of characters or words of a “Post Excerpt” builder item
To limit the number of characters in the Listing Builder’s “Post Excerpt” item, add the following code to your (child) theme’s functions.php:
How to use custom PHP code?
PHP code can be added to your (child) theme's functions.php file. Alternatively, you can use the Custom Hooks add-on, or a code snippets plugin. More info
add_filter( 'facetwp_builder_item_value', function( $value, $item ) { if ( 'post_excerpt' == $item['source'] ) { $value = substr( $value, 0, 120 ); // Limit to 120 characters } // Optional: add something after the trimmed excerpt: if ( strlen($value) == 120 ) { $value .= ' (…)'; // Adds a space, then an ellipsis character (…) within parentheses. } return $value; }, 10, 2 );
If you want to limit the excerpt by number of words instead of characters, you can use the wp_trim_words() function, which also has parameter to append something after the trimmed string, like an ellipsis character (…, displaying as: …):
How to use custom PHP code?
PHP code can be added to your (child) theme's functions.php file. Alternatively, you can use the Custom Hooks add-on, or a code snippets plugin. More info
add_filter( 'facetwp_builder_item_value', function( $value, $item ) { if ( 'post_excerpt' == $item['source'] ) { $value = wp_trim_words( $value, 10, ' (…)' ); // Trim to 10 words and add space and ellipsis. } return $value; }, 10, 2 );
To add a “read more” link to the end of your trimmed excerpt, see this example above.
Add a “No results” text
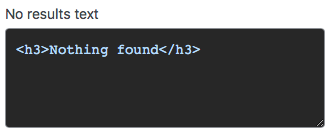
Since FacetWP v4.1.5, Listing Builder listings have a “No results text” setting.
Just add the text that you want to show when there are no results.
The field also accepts HTML and shortcodes.
Customize or translate the “No results” output
If the “No results text” field is not flexible enough, you can use the facetwp_template_html hook to create the desired output. Note that anything that is output by this hook will override the listing’s “No results text” setting completely.
Here is a simple example that sets a “No results found” text wrapped in <p> tags:
How to use custom PHP code?
PHP code can be added to your (child) theme's functions.php file. Alternatively, you can use the Custom Hooks add-on, or a code snippets plugin. More info
add_filter( 'facetwp_template_html', function( $output, $class ) { if ( $class->query->found_posts < 1 ) { $output = '<p>No results found</p>'; } return $output; }, 10, 2 );
If you need the message to be translatable, you can wrap the text in __(). This makes the text a translatable string that will appear in e.g. WPML string translations or any other translation plugin. The string can also be translated with WP’s gettext filter (see this example).
In the following example, we additionally pass the string through the facetwp_i18n filter hook, which now can also be used to add your translations.
How to use custom PHP code?
PHP code can be added to your (child) theme's functions.php file. Alternatively, you can use the Custom Hooks add-on, or a code snippets plugin. More info
add_filter( 'facetwp_template_html', function( $output, $class ) { if ( $class->query->found_posts < 1 ) { $output = '<p>' . facetwp_i18n( __( 'No results found', 'fwp-front' ) ) . '</p>'; } return $output; }, 10, 2 );
The facetwp_template_html hook can be used to output any plain HTML or PHP-generated content, so you could also use a (custom) shortcode:
How to use custom PHP code?
PHP code can be added to your (child) theme's functions.php file. Alternatively, you can use the Custom Hooks add-on, or a code snippets plugin. More info
add_filter( 'facetwp_template_html', function( $output, $class ) { if ( $class->query->found_posts < 1 ) { $output = do_shortcode('[my-shortcode]'); } return $output; }, 10, 2);
It is also possible to dynamically output facet value(s) to the text, so you can display a “No results found for { facet value(s) }” text. This will only be usable if you have a limited number of facets. Or you can use it only if a Search facet is in use, to display the search keywords in the message:
How to use custom PHP code?
PHP code can be added to your (child) theme's functions.php file. Alternatively, you can use the Custom Hooks add-on, or a code snippets plugin. More info
add_filter( 'facetwp_template_html', function( $output, $class ) { if ( $class->query->found_posts < 1 ) { // The default (translatable) text $output = __('No results found', 'fwp-front' ); // Output default text + "for" (translatable) + chosen facet value(s), // resulting in the text: "No results found for { facet value(s) }" // Change "my_facet_name" to the name of your facet (2x): if ( isset( FWP()->facet->facets['my_facet_name'] ) ) { $keywords = FWP()->facet->facets['my_facet_name']['selected_values']; $keywords = is_array( $keywords ) ? implode( ' ', $keywords ) : $keywords; } if ( ! empty( $keywords ) ) { $output .= ' ' . __( 'for', 'fwp-front' ) . ' ' . $keywords; } // Add extra HTML tags $output = '<h3>'. $output . '</h3>'; } return $output; }, 10, 2);
Translate the Button item text
If you are using a Button item in your listing, the Button text (as set in the Button item’s settings) can be translated using the facetwp_i18n hook.
The following example translates a Button text “More information” to Dutch and Spanish. Note that this code assumes a multi-lingual site setup, in which each page has a set language.
How to use custom PHP code?
PHP code can be added to your (child) theme's functions.php file. Alternatively, you can use the Custom Hooks add-on, or a code snippets plugin. More info
add_filter( 'facetwp_i18n', function( $string ) { if ( isset( FWP()->facet->http_params['lang'] ) ) { $lang = FWP()->facet->http_params['lang']; $translations = []; $translations['nl']['More information'] = 'Meer informatie'; // Translate default text to Dutch $translations['es']['More information'] = 'Más información'; // Translate default text to Spanish if ( isset( $translations[ $lang ][ $string ] ) ) { return $translations[ $lang ][ $string ]; } } return $string; });
Customize Listing Builder listing queries
If you need to override the query arguments that you have set in the Query tab (for example only on certain pages), you can use the facetwp_query_args hook.
This hook works similarly to WP’s pre_get_posts hook, but unlike that hook, it only runs on pages with facets, and it has access to information about the page, listing template and facets used. This can be used to let the code run only in certain conditions. For example, you can check:
- if a specific Listing Builder template is used,
- if the page has a specific URI, or
- if specific facets or facet choices are currently in use.
See the examples on the hook’s page for ways to use this.
Add custom shortcode attributes
The facetwp_query_args hook can also be used to add one or more custom attributes to a Listing Builder shortcode:
How to use shortcodes?
Shortcodes can be placed directly in post/page edit screens. You can also add them in text/HTML widgets. The WordPress Block Editor has a Shortcode block to place them in. And most Page builders have a dedicated shortcode module/widget. In PHP templates, shortcodes can be displayed with WP's do_shortcode() function:
echo do_shortcode('[my-shortcode]');. More info[facetwp template="publications" project="housing"]
And then use those custom attributes to change or narrow the query.
Register listings programmatically
With the facetwp_templates hook, it is possible to programmatically register/add new listings in code, rather than using the plugin interface. There are several reasons why you may consider doing this:
- To prevent users from changing listing settings.
- You can have your listings and their settings under version control. This way you can revert to previous sets of listings or previous listing settings.
- If your listings and settings are tied to a theme, anyone using the code/theme automatically has the registered listings and their settings.
- If you are using FacetWP with WordPress multi-site, all sites in the multi-site network can have the same listings and lising settings, as long as they are using the same theme.
Note that there is a similar hook, facetwp_facets, to programmatically register facets.